The Common Heritage of the Les Paul and SG Models

Two timeless classics that emerged from the same early drive to establish a cornerstone solid body electric guitar, Gibson’s Les Paul and SG arguably have more in common than not, yet the elements that distinguish them result in two very different instruments. You can perform many of the same tricks on each, certainly, but there’s no mistaking one for the other, either in terms of looks, feel or sound. Laying out the essential elements of each can help us get a handle on where and why the differences exist, and how they can work to our advantage, but first let’s take a brief look at how Gibson’s flagship single-cut ever became a double-cut in the first place.

The Birth of the SG: Evolving Styles

Despite the fact that it would eventually become the most-revered electric guitar every made, Gibson’s Les Paul hadn’t really found it’s groove by 1960. The model’s iconic form had been established by 1958, when the PAF humbuckers of ’56 were joined by a new sunburst top, but sales had still failed to catch fire. Gibson records show that after shipping 920 goldtops in 1956 and 598 in ’57, the company only sent out 434 sunburst Les Pauls in ’58. That number rose to 643 in ’59, then declined to 635 in ’60.

Part way into ’60 Gibson reassessed the Les Paul conundrum: the model was, on one hand, just too far ahead of its time (about six years, to be precise), while on the other it was viewed by many players as being too traditional, too stodgy even. At the turn of the decade, the trend was for flashy, sharp, colorful, pointy, and with all due respect, the Les Paul was none of these. With a body made of solid mahogany with an elegantly carved solid maple top, binding on the body’s top edge, and other time-tested elements of traditional Gibson luthiery, it was also an elaborately constructed instrument—amid a field of slab-bodied, flat-topped competitors—and arguably not worth the effort amid lackluster sales.

Click to Enlarge

As such, it made total sense to kill three birds with one stone: transform the Les Paul Standard into a guitar that still sounded great and felt sublime to play, but which was both easier and less costly to manufacture, and which checked all the stylistic boxes for the trends of the day.

And Then There Were Two

The new model of ’61 shot off the line with a sleek double-cutaway body made purely of solid mahogany, with a pair of pointy and subtly asymmetrical horns that made it one of the sexiest guitar designs around. The body was also slimmer, and therefore lighter, than the chunky single-cut Les Paul that had preceded it—another bonus—and was finished in a bright cherry red, while its Custom counterpart came in flashy Arctic White, still with all the multi-ply binding and gold hardware bling.

This guitar remained the Les Paul Standard in Gibson’s catalog, while it’s fancy partner was the Les Paul Custom. After ’63, though, when Les Paul’s endorsement deal was on a temporary hiatus, it became known as the SG Standard, the name we’ve associated with the double-cut ever since, while earlier examples are now often referred to as “Les Paul/SGs”. In any case, the change-up worked, and the new design clearly sparked interest from a much wider swathe of players. Gibson shipped a whopping 1,662 units in the new version’s first year, not far short of three times the number of Les Paul Standards sold in 1960. The new Les Paul Custom, which now came with a white finish and three pickups, saw an equally copious upturn in production, with 513 shipped in 1961.

Common Ingredients

Other than the new chassis, the new double-cut Les Paul still received all the same hardware and electronics that the single-cut had had: Kluson tuners, Gibson’s Tune-o-matic bridge, and a pair of humbucking pickups, which were (for now) still the same PAF units with which the last of the ’60 single-cut Les Pauls had been equipped. The guitar’s neck was essentially the same, and the scale length was the same 24.75″ familiar to Gibson players. Given the extent to which pickups, hardware, and scale length play a role in forming any guitar’s sonic signature, these were certainly significant.

Most examples of the new Les Paul Standard and Custom came with one very different piece of hardware, however, in the form of the Deluxe Vibrato, often referred to as the “sideways vibrola” for the way it was operated. Little loved by Gibson fans, this unit was often simply ignored for fear of putting the guitar out of tune through too much use, and many early Les Paul/SGs were special-ordered with stopbar tailpieces (or converted to such) to bypass this vibrato’s inconsistencies altogether. By the time the Les Paul officially became the SG, the Deluxe Vibrato was fading from the picture, and SGs came standard with much more player-friendly tailpieces.

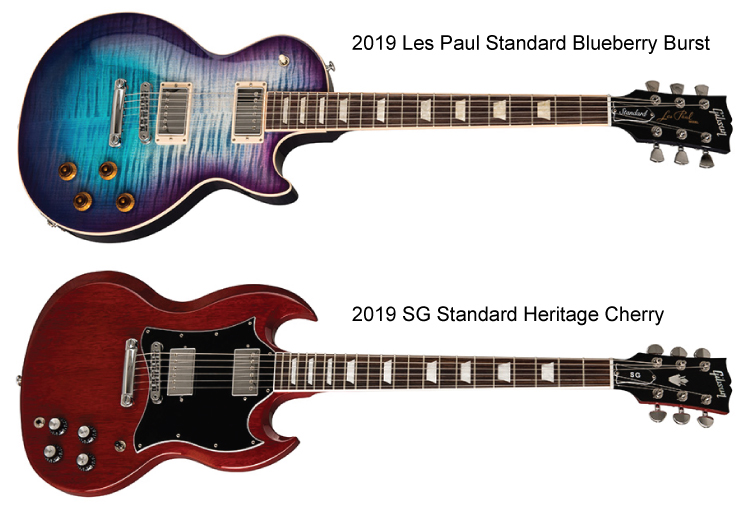
A Tale of Two Tones: SG vs Les Paul

Side by side, as configured today, there’s really very little between the Les Paul and the SG other than the shape of the body, and the thickness and composition of the wood. So why such distinct personalities?

The answer to that question shows us just how significant that thinner, all-mahogany body is in the equation. The classic single-cut Les Paul is best known for its thick, rich, warm tone with ample lower-midrange grunt and excellent clarity throughout the range, plus its singing lead tones when injected through a cranked amp, a high-gain channel, or a good overdrive pedal.

While, however, we think of thicker all-mahogany guitars as being “warmer” and “darker” than the Les Paul Standard’s maple-mahogany construction, the SG’s thinner body and higher neck/body joint lend the model a snappier, janglier voice that has a little more chime to it. The SG still has good warmth and depth, but it trades some of that lower-midrange grunt for brighter upper-midrange cut. Crank it up, and it will still wail and sing, of course, but it’s lead tone often leans a hair more toward “bite” while the Les Paul’s tilts slightly more toward “thick”.

Fraternal Twins

All that being said, there’s a ton of crossover between the Les Paul Standard and the SG Standard, and, practically speaking, you can easily substitute one for the other for a good, oh, let’s say 78.35% of your playing without anyone taking a blind bit of notice (that figure was not arrived at under laboratory conditions, but you get the idea). Massive rock crunch and power-chord goodness? Check for both. Trenchant clean tones with full-bore humbucker body and girth? Check for both. Wailing rock-godliness when your solo comes up? Check for both.

Let’s just say, then, that the Les Paul and SG share a common soul, and they both have a lot of heart. When you need the added sonic nuance of some extra lower-midrange thump or that extra ounce of sustain, give a Les Paul a try. When you want a slightly more eviscerating breed of lead tone or a little more chime in your jangly semi-clean arpeggios, grab an SG. Otherwise, there’s no reason not to let your sense of esthetics—or what the heck, you probably need one of each anyway.

Dave Hunter   11.12.2018
Naperville Music, your home for everything Gibson.
Posted in Gibson Guitar Stuff | Leave a comment

How to Choose Electric Guitar Strings

How to Choose Electric Guitar Strings

Everything you need to know about Fender’s collection of electric guitar strings.

By Mike Duffy

There is no doubt that strings greatly affect the tone and playability of your electric guitar. Let’s face it, if you don’t want it to be just another percussion instrument in your collection, you need strings.

And when it comes to Fender electric guitar strings, there are a lot of factors to consider as you decide which set to purchase, such as the musical genre you want to play, how often you play and your guitar’s scale.

For Fender’s slate of electric guitar strings, these things will impact those factors:

  • – Gauge
  • – Materials
  • – Core
  • – Winding Method

In this piece, we’ll break down everything you need to know to ensure you’ve got the right strings on your Stratocaster, Telecaster or any other electric guitar.

String Gauges

“String gauge” refers to the size of the string, as in how thick, measured in thousandths of an inch. The gauges for a six-stringed guitar range from the smallest on the high E string and level up to the B, G, D, A and low E strings.

Generally, lighter gauge strings are easier to play, brighter, allow you to bend strings and fret notes easier, and exert less tension on your guitar’s neck.

On the other hand, lighter gauges offer less sustain and volume, and can break more regularly.

Meanwhile, heavier gauges give you more volume and sustain, allow you to dig in and play harder, and are typically preferred for drop-tunings and alternate tunings. Still, the increased size adds more tension and can be more difficult to bend and fret.

As a rule of thumb, if you want to play fast leads and chords, light gauges may be the way to go (metal players with a preference for drop-D tuning would still need a heavy gauge for the lower strings or wound strings). Lots of blues and rock guitarists land on medium gauges that offer the benefits of both worlds, while jazz guitarists who don’t bend a lot of notes tend to use heavy gauges, sometime with a wound G string.

Fender string gauges can be summed up thusly (from the high E to low E strings):

  • – “Extra Super Light:” .008/.010/.015/.021/.030/.038
  • – “Light:” .009/.011/.016/.024/.032/.042
  • – “Light-Regular:” .009/.011/.016/.026/.036/.046
  • – “Regular:” .010/.013/.017/.026/.036/.046
  • – “Regular Heavy:” .010/.013/.017/.032/.042/.052
  • – “Medium:” .011/.014/.018/.028/.038/.049
  • – “Heavy:” .012/.016/.024w/.032/.042/.052

String Materials

Fender electric guitar strings are made of steel, so they properly transmit the string vibrations to the magnetic pickups. The low E, A and D strings are wound with various alloys, while the G, B and high E strings are tin-plated.

Below are the common materials used for wound strings in Fender’s lineup:

  • – Nickel-Plated Steel: A popular option with balanced tone between warmth and brightness and a fast attack.
  • – Vintage Nickel: A little more warmth than nickel-plated steel.
  • – Stainless Steel: Very bright tone with excellent sustain. Also resistant to corrosion, so they will last a long time.

String Core

String cores are also made of steel in most cases. The core refers to the center of the string, with windings going around it to create larger, wound strings.

Hexagonal-shaped wires have been used in more modern string construction, as they hold the outer windings in place and hold tune well.

Click to Enlarge

String Winding Method

A roundwound string uses a round wire to wrap around the inner core of the string, while flatwound uses a flat wire (think tape).

Roundwound is the most popular way of string winding, as they are available in the widest selection of gauges and materials. They are said to have a brighter tone with great sustain.

Flatwound, which are favored by many jazz players, tend to have a smoother playing feel and darker tone. Because of their flat surface, they can also be easier on the fingers.

Click to Enlarge

String Ends

Fender offers strings with ball ends and Bullet ends.

Ball end strings work on all electric guitars. On ball end strings, the core wire of the string wraps around a separate piece, a tiny metal “ball.” This creates a small V-shaped area of “slack” fit in the two places where the wire loops around the ball. At normal string tension, this “slack” wire loop is taut and unbent, and the ball end is prevented from completely abutting the bridge plate.

Bullet strings attach a tiny cylinder of brass shaped like a bullet to the end of the string in a one-piece construction. There is no loop and hence no slack, and the business end of the bullet makes tighter and more uniformly solid contact with the bridge. Further, the nature of the precision-machined Bullet end design meant that the string returned to the exact same position every time, greatly improving tuning stability even after heavy tremolo use.

The string design was specifically made for Stratocaster guitars because the Bullet ends fit far more precisely into the tremolo block, closely fitting the circumference of the string channel, adding sustain.

Click to Enlarge

What to Look for When Caring for Strings

Because electric guitar strings are made out of steel, they contain iron, which corrodes when exposed to oxygen. It won’t be overnight, but humidity and the residue left behind by your hands can speed the process.

Luckily, regularly cleaning your strings will keep them stronger longer. Use some string cleaner with a special wipe, or simply a polish cloth, to keep things properly maintained. Fender also offers the Speed Slick guitar string cleaner applicator that restores and extends string life with a few swipes up and down the string.

Finally, don’t forget to wash your hands before playing to rid your fingers of potentially damaging oils.

Here are some things that will tip you off that it’s time for a string change:

  • – You are having trouble staying in tune.
  • – The strings have visible corrosion.
  • – Your tone sounds dull.
  • – You can see the windings coming apart.

For a proper tutorial on how to change your guitar strings, take a look at the video below.

https://www.youtube.com/watch?time_continue=191&v=4CtqfHmssx8

The good thing about having a variety of strings for your electric guitar is that you have options. The best way to find out which is best for you is to try several types before you pinpoint your favorite.

Then once you have your strings picked out, just make sure to monitor them regularly so you’re always sounding great.

Naperville Music – Your home for everything Fender

Contact matt@napervillemusic.com

Posted in Fender Guitar Stuff, Uncategorized | Comments Off on How to Choose Electric Guitar Strings

5 Tips to Move from Guitar to Bass

5 Tips to Move from Guitar to Bass

The guitar and bass might be similar instruments, but you need to know these things to make an easy transition.

By Mike Duffy

There are many similarities between the electric guitar and bass.

For one, they are both instruments that utilize magnetic pickups to register the vibrations of metal strings and create sound. Secondly, the lowest four strings on a guitar are the same as the four strings on a bass.

The bass is tuned to a standard EADG, while a guitar‘s six strings are tuned EADGBE (a bass is tuned an octave lower). And, the notes are the same on both, as well!

Even though they’re similar, however, there are several differences between the two that you should consider, whether you’re moving from the guitar to the bass or have never picked up either. Getting a handle on these differences will expedite the process of becoming a good and even great bassist.

Luckily, Fender Play recently launched an essential curriculum for any beginning bass player or a bassist looking to hone their chops. Here are five tips to help you along your bass journey:

Get Used to the Size of the Bass

It’s obvious that basses tend to be larger than guitars. Even though there are fewer strings on a bass, they are much thicker because they need to be tunes so much lower than a guitar’s strings. These large strings exert greater tension on the body and neck. This generally results in a slightly larger body, a thicker neck, longer scale length and larger hardware when compared to a guitar (a Mustang Bass PJ is a good choice should you want a shorter scale and smaller body).

Another decision to make is whether to play fingerstyle or with a pick. Fingerstyle is the most common method of playing bass. It’s versatile, intuitive and offers more subtle dynamics and tonal variety than a pick does, plus it allows you to play slap bass. Prominent fingerstyle bassists include James Jamerson, Duck Dunn, Geddy Lee and Flea.

Playing with a pick changes the string attack, which changes the overall sound when compared to fingerstyle. It can produce a brighter, more abrasive tone that couples well with certain rhythms. Many notable bassists, like Megadeth’s David Ellefson, Guns n’ Roses’ Duff McKagan and Paul McCartney, use a pick.

Practice Restraint to Support the Song

While the guitar tends to be a busier instrument, with multiple duties (lead, rhythm, etc.) throughout a song, the bass tends to be more economical.

But the role of a bass player just might be the most important in a band. The bass sets the foundation of the entire band and sets the pace of the song by locking in with the drums and percussion, even if you’re playing a bassline of single notes. No matter how simple or complex the bassline is, it is a critical element that the rest of the band refers to along the way, so it must be reliable.

Essentially, bassists are responsible for establishing and maintaining the groove, and giving the music depth.

Make Friends with the Drummer

The rhythm section provides rhythmic and harmonic foundation for the lead guitar and singers to build upon. So, the drummer and bassist need to be on the same page at all times. Think about it, you don’t get on the dance floor for a ripping guitar solo. It’s the rhythm and groove that gets people moving. It’s the “engine” of the band.

A good rule of thumb if you’re just starting out is to stay tight with the kick drum (a.k.a. bass drum) and snare drum. You can use octave root notes – the low octave with the kick drum and the high octave with the snare – to construct a solid backbeat.

Walk It Out

A “walking” bassline refers to a way of playing connecting notes between the roots of a song’s chords. This helps the bass parts flow more smoothly by moving from one chord’s root note up or down to the next. Traditionally, walking bass was used in blues or jazz music, but they are becoming more common in other genres, as well.

These transitional notes, also known as “leading tones” since they lead to the next note, can be diatonic or chromatic. Diatonic leading tones take notes from a specific scale or key to conect the dots between different chords. The easiest way to make those steps is to use every fifth chord. Meanwhile, chromatic leading tones don’t necessarily come from the scale or key, but rather fall in between those diatonic notes.

Figure Out When to Fill

A fill is a short musical passage, or riff, that is played between phrases to break up the groove and make things a little more interesting. Basically, you’re embellishing the bassline with a little expression to move the song forward in between a verse and a chorus, for example.

Now, the above note must be put into practice with restraint; it is tempting when it comes to bass fills. While they do let the bassist stand out, you never want to sacrifice the groove and distract from the song.

To ensure the groove remains tight, be aware of the number of beats to fill before the groove comes back around so the transition is seamless. Many of the best fills end on the first beat (and on the root note) of the next measure.

Naperville Music – Your home for everything Fender

Contact: matt@napervillemusic.com

Posted in Guitar Other | Comments Off on 5 Tips to Move from Guitar to Bass

7 Reasons to play the Ukulele

7 Reasons You Should Play the Ukulele

This fun and entertaining instrument is easy to learn. If you’re not playing one already, these reasons might get you to start.

There’s no denying the ukulele‘s charm. Its happy tone has helped it make a comeback in recent years, and you’ve no doubt heard it featured in popular songs on the radio, with artists like Grace VanderWaal, Ingrid Michaelson, Eddie Vedder and Merril Garbus of tUnE-yArDs showcasing the ukulele in recent hit albums.

The ukulele is a great instrument to pick up, whether you’re a guitar player looking for a little variety or even if you’ve never played an instrument before.

Here are seven reasons to start playing the ukulele now:

It’s Easy to Learn

The ukulele is easier to learn than the guitar and other stringed instruments like the mandolin. Its soft nylon strings are gentler on your fingertips and don’t create finger pain like guitars do. The small size reduces wrist tension because the notes are reachable without stretching. Plus, it only has four strings, which makes chord shapes and scales easier to learn.

It’s Affordable

Buying a ukulele won’t strain your wallet the way other instruments do. You can buy a nice new uke for around $100, and there are different body sizes (soprano, concert, tenor, baritone) to fit your needs and budget so you don’t have to stress about it getting damaged.

It’s Portable

It’s the ultimate travel instrument. You can take it virtually anywhere. Toss it in the back of your car. Take it to the beach. Bring it on a plane. Drummers and tuba players should be so lucky!

It’s Fun and Friendly

The ukulele is an incredibly social instrument because it’s not intimidating at all and can be played by anyone, young or old, musician or non-musician. Its happy, joyful tone make it a delight to play and accessible to everyone.

They Just Sound Great

The ukulele has a rich, warm sound that is sure to put a smile on your face and those around you. It’s a perfect pick-me-up whether in your bedroom by yourself or at a party with friends.

Songs Easily Adapt to the Ukulele

You can play most popular songs on the ukulele in a variety of genres (yes, even metal). And even those songs with complex chords can be pared down to the ukulele to make them easier to play because of the instruments four strings.

Guitar Technique and Knowledge Translates to the Uke

Guitar players can switch back and forth between the uke with ease. All of the scale and chord shapes that you learned on the guitar can be used on the ukulele, they just have different names.

By Dan Macy and Mike Duffy

Naperville Music – Your home for everything Ukulele.

Contact matt@napervillemusic.com


Posted in Learning Music, Uncategorized | Comments Off on 7 Reasons to play the Ukulele

Guitarology: Solid, Layered, and Laminate Acoustic Guitar Woods

Body Materials

Like a good meal, with a quality guitar, good ingredients matter. Let’s focus on the materials used to construct the guitar body. At its essence, the body is a shapely sound box that functions as a natural amplifier for the strings. You strum a chord, the taut strings vibrate and channel that energy into the contoured box created by the assembled top, back and sides, and push that air out through the soundhole as, well, sound.

While different types of materials can be used for the body, the most common is wood. In fact, the particular species of wood used for the top, back and sides of a guitar will play a significant role in “flavoring” its sound. We’ll save our tonewood comparison for another post. Let’s take a closer look at wood and other material components.

Solid Wood

One of the widely recognized distinguishing features of a premium or professional-grade acoustic guitar is the use of solid wood panels for the top, back and sides. Solid wood construction tends to express a wood’s tonal personality in the fullest, most complex way, resulting in a superior musical sound. The particular species of wood, and the properties associated with it, will also impart the most sonic color or flavor to the sound when made with solid wood.

Another appealing payoff with solid wood is that the guitar’s sound will improve with age and extended playing as the cell structure of the wood naturally changes over time, making the guitar even more resonant and responsive. (Think of a fine wine’s flavor profile improving with age or the way a baseball glove or a pair of jeans gets worn in with use.) This is one of the rewards of owning a well-crafted solid wood guitar and why, if well cared for, it makes an heirloom-quality instrument.

Because of the premium tonal response of solid wood and the cost associated with sourcing, conditioning and carefully processing the exotic tropical tonewoods favored for guitars, solid wood acoustic guitars tend to be the most expensive. But they typically deliver the highest level of musical fidelity.

Laminate Back and Sides

In an effort to offer customers other more affordable options, many builders also make guitars featuring laminate back and sides. Using solid wood for the top is still preferred by most builders because the top plays a major role in translating the initial energy of vibrating guitar strings into rich acoustic sound. That’s why the top is referred to as the soundboard.

Laminate refers to a multi-layered construction. You probably know the term from the flooring or cabinet industries. In the guitar world, laminate construction refers to thin layers of wood or other material that are bonded together, sometimes featuring an outer layer of exotic, visually appealing veneer. (Picture the rich-looking burled wood trim found on a luxury car’s dashboard.) Laminate construction enables builders to reduce their material cost, streamline the production process, and conserve wood resources. For example, in cutting solid wood panels for acoustic guitars, the yield is about four pieces per inch of thickness (the typical thickness of a back/side panel is about 3/16 of an inch). The cutting process also produces a certain amount of material loss from the sawdust generated. By contrast, the thin sheets of wood used for outer veneer of laminate back and sides are cut differently — they’re sliced or peeled with a fixed blade, almost like a deli slicer cuts thin pieces of lunch meat, or like peeling an apple. The yield is usually between 30 and 40 slices per inch, without generating any loss of material in the form of sawdust.

The laminate construction process can also yield greater structural resilience, since the layers are typically arranged using alternating grain directions. This durability can help the guitar remain structurally stable in the face of fluctuating humidity conditions — which is nice if you plan to travel with the guitar — and leave that part of the guitar less vulnerable to the possibility of cracking in dry conditions (which is an important consideration for acoustic guitars). At Taylor, the wood lamination process also allows us to bend an arch into the back of the guitar for added strength, which eliminates the need for internal bracing to support the back.

All Laminates Are Not Created Equal

Where things can get murkier is the nature of laminate construction. While some laminate construction, such as our approach at Taylor, features a three-ply all-wood laminate — a  core wood panel (poplar wood) with a layer of wood on either side — in recent years, modern laminating techniques from other industries, such as the countertop manufacturing industry where Formica originated, have also been deployed in the construction of acoustic guitars.

“What a lot of people call laminate isn’t really wood,” says Taylor master guitar designer Andy Powers. “Or it’s just one layer of veneer laminated to Formica, phenolic, plastic resin, or some hard, dense material that isn’t really wood. This is common in the flooring industry now. For years and years floors were just boards, whereas now they’re strips of plywood with the nice veneer on top. They call these engineered floors.”

Once that approach caught on, manufacturers started making flooring out of MDF (medium density fiberboard), which is compressed sawdust — think of most IKEA furniture — held together with heat and resin.

“It looks like plywood but costs way less,” Andy says. “Producers will apply shelf paper on top and they call it laminate. Formica, or HPL (high-pressure laminate), is compressed craft paper with a printed veneer on top. Many of these aren’t even wood; they’re just printed with wood grain on top.”

In one sense, this approach might seem eco-friendly because it makes good use of the material, but in reality it isn’t because of the glues, the resin process, and the chemicals used. Using plantation-grown and -managed wood is actually far more environmentally friendly.

Layered Wood

To avoid confusion with the array of laminate products in the marketplace that are made with synthetic, non-wood materials, at Taylor we use the term “layered wood” to identify Taylor guitars built with laminated backs and sides. (All Taylor models feature solid wood tops.) In home construction products, all-wood laminates are seen as a more premium product compared to other laminates, as they should be in guitar building, as more wood equals better tone.

To be clear, the composite nature of layered wood back and sides won’t produce quite the same level of sonic detail as solid wood backs and sides will. “The veneers will still color the tone, but the guitar becomes more of a reflection of the design,” Andy says. “But with HPL or other laminates, there are no sonic differences.”

That said, the tone of Taylor’s layered wood guitars will still improve as the guitar gets played in and ages, due to the solid wood top. And keep in mind that the quality of the materials is just one element of a guitar’s construction. There are plenty of other design strokes that contribute to a guitar’s sound profile, including the body geometry, internal bracing structure, and more. That’s why the nuances techniques of a skilled builder matter. In fact, Taylor Guitars co-founder Bob Taylor once built a guitar out of repurposed wood from a beat-up shipping pallet to prove that very point. (And yes, it sounded good.)

Within Taylor’s product line, our all-solid-wood guitar bodies range from the 300 Series and up. Guitars featuring layered wood back and sides with a solid wood top include the 100 Series through the 200 Deluxe Series, along with the Baby Taylor, GS Mini, and Academy Series.

Naperville Music, your home for everything Taylor!

Posted in Uncategorized | Comments Off on Guitarology: Solid, Layered, and Laminate Acoustic Guitar Woods

Taylor 101: 5 Things You Get with a Taylor


Top-Notch Craftsmanship

A tour of the Taylor factory in El Cajon, California (weekdays at 1 p.m. if you find yourself in the San Diego area) reveals our proprietary blend of precision engineering and hands-on craftsmanship. We’ve pioneered the use of laser mills, robotic finish application, and other high-tech processes, which help ensure consistent build quality on all of our acoustic guitars, but we also believe in the value of the human touch. Every Taylor guitar ships to a store after being carefully built and inspected by our skilled craftspeople, with the highest levels of quality assurance.

One thing you’ll notice about every Taylor acoustic guitar you find in a store, no matter what series or price point, is that it has a solid wood top. A guitar with a solid top will produce better sound—typically more dynamic range and a more expressive tone—than one made with a laminate top. Plus, the sound of a solid top actually improves as the guitar ages and is played in, creating a richer, more resonant tone over time.


Playability

If there’s one term that you’ll hear used to describe Taylors more than any other, it’s “playable.” From the beginning, we’ve sought to build guitars with easy-playing necks, which help musicians play their best.

It starts with our sleek, hand-friendly neck profile and continues with our patented Taylor Neck, which is featured on most of our guitars (with the exception of Baby and Big Baby models). One of our major innovations as a guitar company, the design allows us to consistently set the ideal neck angle for playability. The design also lends itself to easy micro-adjustments in the neck angle over time (think of it as a minor tune-up as a guitar settles into its environment), which will preserve that playability for decades to come. If you’re a seasoned player with particular playing preferences, the neck design also makes it easy for a Taylor service technician to perform a custom setup to help you dial in the right feel for your playing style.


Friendly Service

Taylor is a full-service company, which means not only do we produce high-quality instruments, we also support them with a dedicated customer service department staffed with experienced guitar experts. Our service department is renowned for being responsive, quick, and most of all, effective in helping you with your needs, whether you need help finding the right guitar or taking care of your existing Taylor. Our guitars carry a lifetime warranty against defects in construction, materials, and workmanship, and our service department offers a range of additional service packages to revitalize your guitar beyond the warranty coverage at a reasonable price within a quick timeframe.


Reliable Cases & Bags

We’re one of the only manufacturers that provides a carrying case with every guitar we sell and includes it in the price of the guitar. All guitars made at the El Cajon factory (300 Series and up), plus the 200 DLX Series (made in our Tecate, Mexico factory) ship with a Taylor hardshell case. We make our hardshell cases in-house, using proprietary molds that are custom-fabricated to securely fit each guitar shape we make, for maximum protection.

Our other guitars ship with either a soft gig bag or a hard bag (GS Mini, 200 Series), both of which provide excellent protection and carrying convenience for your guitar. Many of these are also produced in-house. All of our cases provide some measure of protection against changes in climate and humidity.


Environmental Responsibility

As we’ve grown as a company, we’ve assumed a leadership role in the pursuit of sustainable forestry initiatives to preserve the tonewoods we use in our acoustic guitars. We recognize our responsibility to help preserve the supply of natural resources for future generations. The world’s forests have given us so much, and our goal is to leave behind much more than we take, which is why we’re investing in innovative replanting programs with species like ebony in Cameroon and koa in Hawaii. When you purchase a Taylor guitar, you can feel good about supporting the highest levels of ethical, eco-conscious business.

Naperville Music, your home for everything Taylor!

contact: Connor@NapervilleMusic.com

Posted in Taylor Guitar Stuff | Comments Off on Taylor 101: 5 Things You Get with a Taylor

The Guitar That Launched The Beatles

The Guitar That Launched The Beatles

Andrew Vaughan

“Love Me Do,” The Beatles’ first-ever single, announced a revolution in rock and roll. The fresh-faced Liverpudlians — Lennon, McCartney, Harrison and Starr — sounded like nothing else on British radio in October 1962. As Harrison remembered in The Beatles Anthology: “First hearing ‘Love Me Do’ on the radio sent me shivery all over. It was the best buzz of all time. We knew it was going to be on Radio Luxembourg at something like 7:30 on a Thursday night. I was in my house in Speke and we all listened in.”

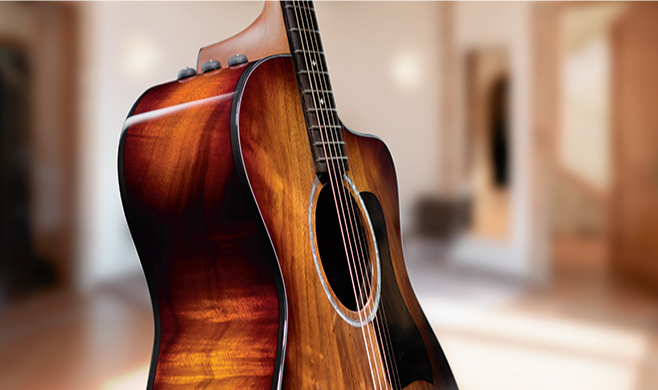
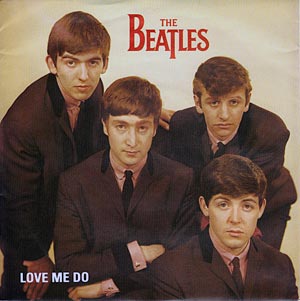
With its Everly-inspired harmonies, strident bass and thumping drums and that distinctive, bluesy harmonica riff, “Love Me Do” stood out amidst a sea of early ’60s British pop mediocrity. And high in the mix is Lennon’s chiming acoustic guitar, played on his new and highly prized Gibson J-160E.

1962 was a crucial year in Beatles history. Liverpool businessman Brian Epstein signed on as manager in January, Lennon’s art-school pal and the band’s original bass player, Stu Sutcliffe, died in April and, after being turned down by pretty much every label in town, they finally signed a record deal in June with Parlophone. They made their first test recordings with George Martin in June. In August, Lennon got married and The Beatles finally became The Fab Four when, Ringo Starr joined the holy trinity of John, Paul and George.

With Pete Best still on drums, the group had gone to Abbey Road for some test recordings in June and had been told a few home truths by the studio engineers and Mr. Martin. Engineer Norman Smith told Mark Lewisohn in The Complete Beatles Recording Sessions that the band were given “a long lecture about their equipment and what would have to be done about it if they were to become recording artists.”

Taking the recording studio advice to heart, George Harrison and John Lennon, remembering Tony Sheridan’s impressive Gibson ES-175, decided they needed some Gibson power and finesse of their own and both fancied a J-160E acoustic. The only problem with that was the price. England, in 1962, was still recovering from two World Wars. The economy was still precarious and the average yearly wage was only £800. The Gibson J-160Es cost a cool £161 apiece, a steep price for even a successful live band of the time. Fortunately, The Beatles had a relatively wealthy manager in Brian Epstein and he co-signed for their payment plan at Rushworh’s music store in Liverpool. But even Epstein took a year to pay off the guitars!

The famous old music store was one of a select few Liverpool stores for U.S. guitars, which were still tough to acquire in England in 1962. It was the store where Paul McCartney’s father bought the 14-year-old Macca his first guitar. The Beatles purchased a lot of their early band instruments from Hessy’s music store in Liverpool, but their tab had passed £200 when Epstein came into the picture and he had to pay off the debt with a personal check.

So Rushworth’s it was for the Gibsons. A photo-op ceremony was set up from Bill Harry’s Merseybeat paper, and John and George were both presented with their prized sunburst Gibson J-160Es by James Rushworth. Peter Kaye took pictures for Merseybeat and the shot was printed in the paper with the caption, “John Lennon and George Harrison of The Beatles, seen at Rushworth’s when they received their Gibson guitars–the only ones of their type in the country–which were specially flown to England by jet from America.”

The J-160Es arrived just in time for the historic London recording sessions the next day, September 11, when at EMI Abbey Road Studio Two London, Lennon played his brand spanking new Gibson J-160E on the sessions for The Beatles’ first single.

Their record was released just three weeks later, on October 5th, 1962, on the Parlophone label. “Love Me Do” made it to #17 on the U.K singles chart. The Beatles had arrived.

Lennon used his Gibson J-160E extensively over the next year for recordings, radio and TV appearances and live shows. But in December 1963, just after Epstein had made his final payment for the guitar, the 160E was stolen and never found again. It was, in fact, George Harrisons’ J-160E that Lennon played in scenes in A Hard Day’s Night.

Later in 1964, Lennon picked up a replacement Gibson J-160E, almost the same but with double white rings around the sound hole. This is the guitar he took with him on their historic visit to America in 1964, the beginning of the British Invasion.

Posted in Guitar Other | Comments Off on The Guitar That Launched The Beatles

First Steps: 10 Greats Share How They Began Playing Guitar

First Steps: 10 Greats Share How They Began Playing Guitar

Russell Hall

Any guitarist knows that learning is an adventure filled with discovery, excitement, and – if the player is serious – a heady mix of dedication and joy. The ways in which beginning players set out on that path are infinite, but it’s always instructive to examine the experiences of those who’ve gone before. Below, we’ve gathered together in-depth quotes from 10 guitar greats, each of whom addresses the issue of learning to play. Feel free to share your own thoughts in the comments section.


Vivian Campbell, 2011

I had a crush on a girl when I was 13. Her mother played guitar, and she showed me the lick for “Day Tripper.” That was the first riff I learned. Mostly I learned by sitting down with albums and working out the songs. That started with Rory Gallagher’s Live! In Europe. The next album I pulled apart in that way was Thin Lizzy’s Jailbreak.  I’m entirely self-taught. The guitarists who influenced me most were blues-based players, so it was more about phrasing than about the technical aspects of the instrument. I do believe it’s more important to have your own voice than it is to have great technique. You could cite Bob Dylan as an example, in a different way. No one would ever say Bob Dylan is a great singer, technically, but when you hear him you sure as hell know who it is.


Steve Lukather, 2011

I was six when I saw The Beatles on “The Ed Sullivan Show.” It was really a spiritual experience. I knew then that that’s what I was going to do. My parents thought it was cute, so they bought me an acoustic guitar and a copy of Meet The Beatles. I desperately wanted to be George Harrison. I’m sure I set the needle on “I Saw Her Standing There” a thousand times. One day I’m sitting there, and suddenly everything made sense. The guitar looked different and felt different. I started playing all the first position chords, with no one having taught me. And I could hear things and play them without anyone showing me. Later, when I was about 14, I dove headlong into music study — orchestration, arranging, guitar lessons, piano lessons, improvisation lessons at Dick Grove School of Music and so on.

Gary Clark Jr., 2015

We were on Christmas break — out of school. The day I went back to school, I went to the library and checked out two books. One was titled “How to Play Guitar,” and the other, “Basic Guitar.” I studied the chord charts, learned the simple G, E, A, B chords — got familiar with placing my fingers in the right position, going for it until it didn’t hurt any more. And then I started figuring out leads by watching other players. A lot of it came from watching “Austin City Limits,” which came on TV every Saturday night. That’s how it started. I also listened the Jackson 5 and other soul records, plus jazz records that my Dad listened to, and stuff on the radio.


Lindsey Buckingham, 2011

My brother started bringing home rock and roll records. Hearing Elvis Presley for the first time affected me profoundly. I got a chord book, and really wasn’t thinking of the guitar as anything other than something with which to learn songs. It was about learning songs, and singing songs – getting close to the songs on that level. I spent a lot of time in my brother’s room, listening to his 45s. I’m sure my parents were wondering about me spending so much time alone. It was something I was very pro-active about, something I took upon myself without any encouragement. There was no one in our household who was musically inclined. I was just lucky enough to have an older brother who was focused on rock and roll, and who was bringing home great stuff on 45s. Without that, I probably never would have gotten into music.


Joe Walsh, 2012

My influence was rock and roll from about 1955 to about 1962 – all that doo-wop and stuff. That’s what I grew up on. I memorized it, and learned it all and learned all the chords. Eventually I got in a band and we played cover songs. It’s essential to play in front of people. Gradually I started changing things in other people’s songs. When it came time to play a lead guitar part, I wouldn’t necessarily play the part on the record. I would play something I liked better. Over time, as you’re sitting around practicing – spending time with your instrument – you begin to come up with your own ideas. The two things that are important are: first, to sit and figure out other people’s parts, including listening to the old blues players, and get a bank of knowledge in your head to draw from; and second, you have to get out and play in front of people. That’s a big part of being a musician. Lots of kids rehearse in their parents’ garage and become legends in that environment. But they never play for anybody.


Richie Sambora, 2012

I approached it a bit backwards. I would put on something like the Live Johnny Winter And album – which has lots of fast lead solos – and try to move my fingers as fast as I thought Johnny Winter was playing. I didn’t know which notes I was playing, I was just trying to get the same type of phrasing going. I did that for a long time, with lots of different albums, and it created a particular kind of muscle memory in my hands. By the time I tried to actually put notes to what I was doing, I was already pretty good. It helped that I was such an avid music listener. I bought a new album every week or two, and really studied them. It also helped that I had played the accordion and the sax and trumpet in the school band. Those instruments came easily to me, so when I started playing guitar, I already knew my ear for music was very acute.


Randy Bachman, 2001

I first noticed guitar when I saw Elvis on television. My cousins played guitar, but it was all country-western music – Johnny Cash, Ray Price … things like that. When I saw Elvis, it was so exciting. Hearing Scotty Moore … I wanted to play that kind of guitar. My cousins were going away on a fishing trip, so I asked them to lend me their guitar while they were gone, and to show me three chords. When they came back, I had taken those three chords, and I was able to play any song I heard on the radio. Because of my playing violin – because you slide up the neck when you’re playing those second and third positions – I just took an E-chord on the guitar and slid it up the neck, and made an F and an F# and a G. When my cousins came back I could already play better than they could, after just four or five days.


Tom Morello, 2011

I didn’t start playing until I was 17. At that time a friend gave me the best advice as far as music goes. He said, “Practice at least one hour a day, every day, no matter what.” I took that to heart and my playing improved. I went from two hours to four hours a day until eventually I was practicing eight hours a day. That means if you’re on vacation with the family in Ireland, for example, you stop at a bus station and play for 45 minutes to get toward your allotted practice time. I did that in an obsessive-compulsive way that I don’t recommend — it precludes a social life. But I fell head over heels for the instrument. Practicing eight hours a day will get you technical ability, but there’s a big difference between being a musician and being an artist. I soon became very accomplished technically. I could play some amazing solos, but the real breakthrough came when I started using the toggle switch to emulate a DJ’s scratching. This was in the very early days of Rage Against the Machine. At that point I went away from practicing scales for four hours a day to concentrating on the parts of my playing that were unique or accidental, and trying to craft those into music and songs. That’s when I found my voice on the instrument.


Joe Bonamassa, 2011

I first held a guitar when I was three years old, and started playing when I was four. I started out playing classical guitar but that involved too much discipline. I couldn’t be bothered with that aspect of it. The blues, on the other hand, is a blank canvas. There aren’t any rules. You can interpret it in any way you want. That really appealed to me, and it still does. I started out trying to emulate my heroes. My influences, early on, were people like Eric Clapton, Jeff Beck, Rory Gallagher, and Paul Kossoff. It was great to stumble upon all these great British blues players who had been influenced by American artists.


Robby Krieger, 2014

I plunked around on the guitar when I was maybe 14 or 15, but I didn’t get serious about it till I was 16. Some of my friends had guitars and I liked the feel of it. I had a piano at my house, which I also liked, but I never got serious about that. And I played trumpet. But every time I would see my friends I would gravitate toward their guitars. When I first started playing I was really into flamenco. My Dad had some flamenco records, which I loved. My buddy Bill Wolf and I took lessons together, and that was the first kind of music I learned to play on guitar. From there I went into folk music, other stuff you could play on that kind of guitar.

Posted in Guitar Other | Comments Off on First Steps: 10 Greats Share How They Began Playing Guitar

Road Rig Maintenance: 10 Tips to Keep Your Gig Rig Alive and Well

Sweating the small stuff can help a lot when it comes to being gig-ready, especially in situations where you’ve got to set up your amplifier and pedal board, plug in, and play. Preventative maintenance is the secret – although it shouldn’t be one – to making sure that you look and sound professional every time you and your band get on stage.

Road Rig Maintenance Supplies
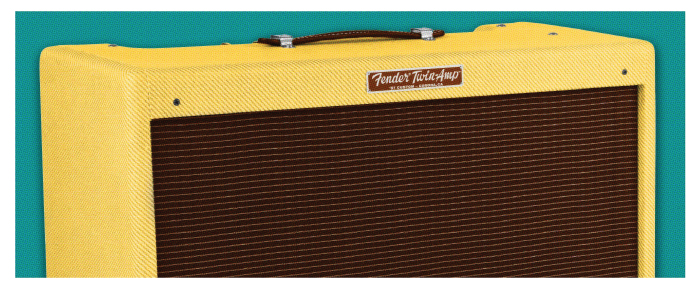
Here are 10 things you need to keep in good condition to avoid live-rig issues and keep on rockin’ under normal road and local club work conditions:

• Tuning Pegs: Take a small screwdriver to the back plate of your guitar’s tuning peg housings every few weeks to make sure they’re secure. Traveling down bumpy highways, onstage collisions with ceiling tiles or other instruments and even regular usage all loosen pegs. And if you’ve got a bent peg head, replace it. It might not be a problem now, but it’s going to be at some point. When you’re in the spotlight the last thing you want to worry about is staying in tune.

• Pots: Your guitar and amp both have rotary potentiometer dials for volume, tone, gain and the like. These should be periodically cleaned with a spray-on tuner cleaner to keep them quiet. They also need to be replaced on occasion, since all switches wear out. A dirty or bad guitar pot can create amp hum that gets exponentially louder through better and bigger p.a. speakers, so numb the hum before it becomes a problem.

• Nuts: Keep your guitar’s nut clean and lubricated. Check the nut slots periodically for greasy sludge from string oxidation and atmospheric exposure. Anything that prevents a string from riding smoothly through the slots will throw off tuning, especially when you bend or use a whammy bar. You’d be surprise how smoke in clubs can affect your instrument’s appearance and the feel of the strings and neck, and create deposits in the nut, without occasional cleaning. A nail file makes a great tool for scraping gunk out of the slots, and if that doesn’t do the trick, apply some graphite to the slots to keep strings moving smoothly.

• Inputs: Check the tightness of the inputs on your guitars, amps and effects pedals regularly. The nuts that hold them in place shake and rattle loose from stage usage and the simple act of plugging and unplugging into them. That creates buzzing and signal decay. Also clean inside the input sleeves using a small amount of rubbing alcohol on the end of a Q-Tip.

• Bridges: A bridge with even the slightest amount of rust can cause buzzing, which you might not even notice until you’re in the studio or playing an important gig – and then it’s too late. Clean bridges with a soft cloth and a hint of alcohol (taking pains not to get any on your guitar’s finish) or even lemon oil. And be careful with multiple-part bridges. For example, the saddles can fall out of Tune-o-Matic bridges if you pop a string in a particularly jarring fashion. To keep the saddles from being lost, you can design a harness by wrapping and securing a length of light gauge guitar string wire around their ends

• Speakers: Check speakers periodically for signs of fraying or other obvious wear, and, if you like your amp’s speakers, have them re-coned at the first hint of degradation. If you store your amps in an even slightly damp environment, rot is also a danger. Some problems are less obvious. If you’re hitting low notes and hear a farting sound, there’s a good chance the speaker coils are shot. Luckily it’s so easy to replace the speakers in most modern amps that it may be cheaper to simply swap out old ones for new ones on your workbench at home rather than reconing or replacing a coil, which require pro-level skill.

• Stomp Box LEDs and Switches: If you’re handy with a soldering iron it’s easy to fix the most common problems with effects pedals – burnt-out LEDs and dead switches. Many replacements can be found at Radio Shack or a good hardware store, and most of the rest can be ordered online at little cost. Don’t be afraid to take a funky pedal to your favorite guitar shop. If you’re a valued customer, they can tell you what’s wrong and suggest the best way to go about making a repair. If they refuse to help, it’s probably time to consider another dealer.

• Guitar Cables: Check the soldering and shielding of any plugs with screw-on sleeves, and if the work doesn’t look solid, don’t buy them. Typically non-budget manufacturers who use gold plugs or sealed plugs are going to have a high quality cable. Soldering will fix most cable problems, but if you gig a lot, consider replacing all of your cables every few years to keep a strong signal running into your amp.

• Plugs: These get funky after being jammed into and jerked out of wall sockets, and can cause buzzing, an intermittent signal and other issues as they begin to fail. At the first sign of a problem simply buy new cables or, on vintage gear with built-in cables, have them replaced.

• Electronics: If you play a lot of live dates and your guitars and amps travel, be sure to give them an annual check-up. Have a luthier you trust look under the hood at the electronics and replace anything that could be on the way out. Small things like switching out old pots or selector switches can increase output and beef up flagging tone. And when capacitors die, so does your amp, so be sure everything gets the rubber glove treatment.

Naperville Music, your home for everything Gibson!

Contact: Connor@Napervillemusic.com

Posted in Gibson Guitar Stuff | Comments Off on Road Rig Maintenance: 10 Tips to Keep Your Gig Rig Alive and Well

Pristine Cleans. Aggressive Overdrive. The Fender Twin Story.

Take a dive into the history of one of Fender’s timeless amps that became the sound of pure rock and roll.

Along with the Bassman, there is perhaps no other Fender guitar amp as enduring and revered as the venerable Twin. It has been universally hailed as one of the all-time great guitar amps ever since it was introduced in summer 1952; prized across genres for its loud, clean tone.

Like the Bassman, which preceded it by mere months, the Twin was unveiled before it had even been named, and its design included some significant firsts. Although it was introduced at the 1952 NAMM show only as Fender’s new “Hi Fidelity” guitar amp, it was, as author Tom Wheeler notes in The Soul of Tone: Celebrating 60 Years of Fender Amps, “a milestone.”

First, although still tweed-covered, it looked different from any previous Fender amp. Fender was phasing out the “TV panel” design introduced in summer 1948 in favor of a more streamlined design in which the grille, no longer recessed, ran from side to side to the inside edges of the cabinet, with wide panels running across the top and bottom of the face. Thus, the new “Hi Fidelity” amp was the first “wide-panel” Fender amp; a design that would soon be adopted for all previous TV panel models.

Second, in terms of speaker area, it was bigger than any previous model. The “Hi Fidelity” amp was only the second dual-speaker Fender model, after the 2×10-inch Dual Professional (later Super) of 1947, but the combined 24-inche cone diameter of its two heavy-duty 12-inch Jensen speakers made it the largest Fender offered.

Third, it was more powerful (25 watts) and it had more sophisticated tone controls than any of its predecessors. It was, for example, the first Fender amp with separate bass and treble controls rather than a single roll-off tone control; a development that the company called “the latest in electronic advances.” Further, it had two volume knobs (bright and normal).

This original version of the amp, model 5C8, was advertised very early on as the “Twin 12 Amplifier” and “Twin 12 Artist’s Model Amp” before Fender settled on a permanent name, the Twin-Amp, which was soon widely known in even shorter form as the Twin.

In true Fender form, revisions and improvements were instituted almost immediately. The second wide-panel version, mid-1954’s model 5D8, had different preamp, phase inverter and rectifier tubes, and boasted a tonally versatile advance in the form of a presence control and tone controls that were more responsive.

Major cosmetic and electronic changes ensued in 1955. Wide panel amps were only around for a couple years before Fender adopted the narrow panel cabinet style, which dispensed with the wide panels across the top and bottom of the amp face in favor of a larger grille made of a more modern fabric. This new Twin, model 5E8, was given a slightly smaller cabinet with the speakers at the lower right and top left corners rather than simply side by side.

The biggest changes were electronic, though. Refined circuitry boosted model 5E8 to 50 watts, with even more power introduced in 1956 and through the remainder of the 1950s in subsequent variations—the short-lived model 5F8 (1957) and the vaunted model 5F8-A of 1958-1959 were 80-watt and 100-watt Twins that pushed their Jensen P12-N speakers to (and often past) the brink. These amps had six knobs: normal volume, bright volume, bass, treble, presence and new “middle”, and by 1958 their speakers were once again in a straight side-by-side configuration in a larger cabinet.

It’s hard to overstate the significance of the powerful E and F series Twins of 1955-1959. Describing them in The Soul of Tone, Wheeler notes that they and the other narrow-panel amps “offered technological advancements, signature tones, handsome appearance, ruggedness, and a something-for-every-player variety that would take Fender to the pinnacle of amplifier manufacturing.”

Like most other Fender amps, the Twin exchanged its tweed covering for Tolex in 1960, but only after it seemingly “disappeared” for a few months starting in January of that year. Although it ruled the Fender guitar amp line in the ’50s, the Twin, as authors John Teagle and John Sprung note in Fender Amps: The First Fifty Years, “ended up in limbo for a short period” as Fender introduced a new top-of-the-line amp, the Vibrasonic, and perfected its piggyback Showman prototypes (unlike many of its stablemates, the Twin never evolved into a piggyback model).

The Twin resurfaced in June 1960, dressed in brown Tolex and having volume, bass, treble, speed, intensity and presence controls. This was a short-lived version, however; quickly superseded in 1961 by the white Tolex/maroon grille cloth Twin with a control layout of volume, treble and bass (normal channel) and volume, treble, bass, speed and intensity (vibrato channel). The 1962 model received wheat grille cloth late in the year, and a black metal-reinforced handle replaced the brown handle in early 1963.

These blonde Twin amps of the early 1960s (models 6G8 and 6G8-A) occupied the top of Fender’s combo line and were formidable in their own right. Indeed, as Wheeler notes in The Soul of Tone, they had “great looks, a whopping ten tubes, plenty of power, tilt-back legs, gobs of kingpin mojo and one of the best tremolos of all time.”

Then came a watershed: the “blackface” reverb-equipped amps of 1963. It might not be possible to say more in praise of the black Tolex-covered Twin Reverb of 1963-67 than has already been said; Teagle and Sprung describe it as “possibly the quintessential combo amp,” and a model that “speaks with a deep, rich voice, sonorous and confident.”

Introduced in late summer 1963, the 85-watt black Twin Reverb had classic silver-sparkle grille cloth, a raised Fender logo and redesigned dual-channel circuitry (normal and vibrato) with bright switches for both channels instead of a presence control. The “middle” tone control returned on the amp, which had numbered and skirted black knobs and a black control panel (hence the term “blackface”). It too is frequently shortened to “Fender Twin” or simply “Twin”, although it shouldn’t be confused with the tweed and blonde-era Twins, which had vastly different circuits and no reverb.

The original mid-’60s era of the blackface Twin reverb encompasses Fender’s acquisition by CBS, which took effect in January 1965. Generally speaking, Twins that have “Fender Electric Instruments” on their black faceplates were made before the CBS takeover; those that have “Fender Musical Instruments” on their black faceplates date to after the takeover (but not without exceptions; pre-CBS panels were used up through fall 1965).

The blackface Twin Reverb of 1963 to summer 1967 was followed in fall 1967 by the silverface Twin reverb—a member of the first group of post-Leo Fender amps. It had a brushed aluminum control panel, aluminum trim, blue-sparkle grille cloth and a slightly shallower cabinet. Its circuitry remained the same as its blackface predecessor for a short period until a bias balance control was introduced in mid-1968 (a questionable feature abandoned by late 1969). Further, the silverface Twin was boosted to 100 watts.

The mid-’60s also saw Fender’s first ill-fated foray into solid-state amps. The first three appeared in summer 1966 and included a 100-watt transistorized Twin Reverb with dual 12-inch speakers mounted one above the other. It also included the oddball “Style” control, a three-position knob that controlled “Pop”, “Normal” and “CW/RR” settings. No need here to rehash the well-documented failure of the experiment; suffice it to say that the solid-state Twin was retired in 1969 and the entire series was abandoned in 1971.

A master volume control first appeared on the Twin Reverb in 1972. The Fender logo lost its tail by 1976, around which time pull-boost and hum balance controls were added. Power was upped to 135 watts in 1977 with the use of ultra-linear output transformers, but by the late 1970s general quality was seen to have suffered across the amp line.

The blackface look soon returned, becoming an option in 1980 and standard in 1982, which was the final year of production for the traditional Twin Reverb.

The 105-watt Twin Reverb II of late 1982-86 and the 100-watt red-knob (later black-knob) version known as “The Twin” of 1987-94 were loaded with features but bore little more than the most superficial resemblance to their ancestors. The latter was a very popular model and is doubly significant as the first Twin model to appear after CBS sold Fender in early 1985.

As Fender fought its way back to success throughout the latter 1980s and into the 1990s, it returned to tradition with an acclaimed and popular series of reissue amps. Remarkably similar to the original in both appearance and circuitry, the 85-watt blackface Vintage Reissue series ’65 Twin Reverb of 1991 quickly proved a welcome return to vintage form, this time with modern function. Highly successful, it remains in the Fender amp line today and was merely the first of several modern-era amps bearing the legendary name; these include the ’68 Custom Twin Reverb (2013) and ’57 Custom Twin-Amp (2016).

Fender Available at Naperville Music

Contact Connor@NapervilleMusic.com

Posted in Fender Guitar Stuff | Comments Off on Pristine Cleans. Aggressive Overdrive. The Fender Twin Story.

Pin It on Pinterest

Share This